Understanding DaVinci Resolve Resolution: A Complete Guide for Beginners
DaVinci Resolve is one of the most powerful video editing programs used by both professionals and beginners. It offers high-quality tools for color correction, visual effects, and editing. One important part of using this software is understanding DaVinci Resolve resolution and how to set it correctly for your projects.
Choosing the right resolution can make a big difference in how your final video looks and performs. Whether you are making a YouTube video, a short film, or a commercial, the correct settings will help you get the best quality output. In this article, we’ll walk you through everything you need to know about resolutions in DaVinci Resolve, how to set them, and some tips to get perfect results.
What Does Resolution Mean in DaVinci Resolve?
Resolution simply refers to the number of pixels in your video frame. It determines how sharp or clear your video will appear. The higher the resolution, the more detail you’ll see on the screen.
Common video resolutions include:
- HD (1280 × 720 pixels) – Also called 720p. Good for small screens or quick uploads.
- Full HD (1920 × 1080 pixels) – Also known as 1080p. Ideal for YouTube and most online videos.
- 4K (3840 × 2160 pixels) – Great for high-quality professional videos or streaming content.
- 8K (7680 × 4320 pixels) – Used in high-end productions and big-screen formats.
In DaVinci Resolve, you can select any of these or even create a custom resolution depending on your needs.
Why Resolution Matters in Video Editing
The resolution affects both the visual quality and file size of your project.
If you choose a very high resolution like 4K, your video will look sharp and detailed. However, it will also take up more storage space and may require a powerful computer to edit smoothly.
On the other hand, lower resolutions like 720p are easier to edit but may not look as professional, especially on large screens.
Therefore, picking the right DaVinci Resolve resolution is about balancing quality and performance. It’s important to match the resolution to your project goals and your computer’s capability.
How to Set the Resolution in DaVinci Resolve
Setting the correct resolution in DaVinci Resolve is simple once you know where to look. Follow these easy steps to change or adjust your project resolution.
Step 1: Open Your Project Settings
After opening your project, go to the bottom right corner of the screen. You’ll see a gear icon ⚙️ labeled Project Settings. Click on it.
Step 2: Adjust the Timeline Resolution
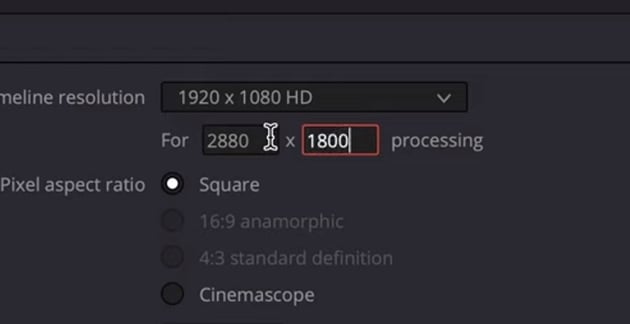
Inside the Project Settings window, you’ll find several options. Under the Master Settings tab, look for the section called Timeline Resolution.
This setting controls how your video appears while editing and in the final export. You can choose from preset options such as 720p, 1080p, 4K, or 8K. You can also type in custom values if you need a specific frame size.
Step 3: Set Frame Rate
Just below the resolution settings, you’ll see the Timeline Frame Rate option. Make sure it matches your source footage. Common frame rates include 24, 30, or 60 frames per second (fps).
Step 4: Save the Settings
Once you set the resolution and frame rate, go to the top right corner of the Project Settings window. Click the three-dot menu (⋮) and select Set Current Settings as Default.
This option ensures that DaVinci Resolve remembers your preferred resolution every time you start a new project. It’s a helpful way to save time and keep consistency across your videos.
Understanding Timeline Resolution vs. Output Resolution
It’s important to understand that DaVinci Resolve has two different resolutions — the timeline resolution and the output resolution.
- Timeline Resolution: This is what you see while editing. It affects playback and how your video looks inside the program.
- Output Resolution: This is the final resolution when you export or render your video.
You can edit your project in a lower timeline resolution for smoother performance and then export it in a higher resolution like 4K. This technique helps reduce lag during editing.
For example, if your final video will be in 4K, you can edit in 1080p and later change the output settings to 4K before rendering.
Tips for Choosing the Right Resolution
Here are some practical tips for selecting the best DaVinci Resolve resolution for your project:
1. Match Your Source Footage
If your camera records in 1080p, it’s best to use the same resolution in DaVinci Resolve. Upscaling from a lower resolution can make your video look blurry or pixelated.
2. Consider the Output Platform
Where will your video be shown?
- For YouTube, 1080p is usually perfect.
- For cinema or TV, 4K is recommended.
- For social media (like Instagram or TikTok), vertical resolutions such as 1080 × 1920 work best.
3. Balance Quality and Performance
Editing 4K footage on a slow computer can be difficult. In such cases, use proxy files or lower your timeline resolution to 1080p while editing. You can still export in 4K later.
4. Use Custom Resolutions for Special Projects
If you’re creating content for a digital billboard, mobile app, or special display, you can enter custom width and height values in the Project Settings.
Changing Resolution Mid-Project
Sometimes you might start editing and realize you need to change the resolution. Don’t worry — DaVinci Resolve allows you to change it anytime.
Just open the Project Settings, go to Master Settings, and choose your new resolution. DaVinci Resolve will automatically adjust the timeline. However, you may need to reframe or resize some clips to fit properly, especially if the aspect ratio changes (for example, from 16:9 to 9:16).
Aspect Ratio and Its Role in Resolution
Resolution and aspect ratio go hand in hand. The aspect ratio is the shape of your video frame, such as:
- 16:9 – Standard widescreen format (used in TVs and YouTube).
- 9:16 – Vertical video format (used for Instagram Reels and TikTok).
- 1:1 – Square format (used for social media posts).
When setting your DaVinci Resolve resolution, always keep the aspect ratio in mind. If you switch from widescreen to vertical, make sure to crop or reposition your clips so that important subjects stay centered.
How to Check Your Current Resolution
To check your current project’s resolution, follow these steps:
- Click on the gear icon at the bottom right.
- In the Project Settings, go to Master Settings.
- Look under Timeline Resolution — your current resolution will be displayed there.
If you want to verify the resolution of an exported file, you can right-click the rendered video on your computer, select Properties (or Get Info on Mac), and look at the video details.
Common Problems with Resolution and How to Fix Them
Even with simple settings, users sometimes face problems with resolution. Here are a few common ones and their solutions:
1. Blurry or Low-Quality Video
- Check if you are viewing in a lower playback quality inside DaVinci Resolve.
- Go to the Playback menu → Timeline Proxy Mode, and select Off or Half Resolution for better performance.
- Make sure your export settings match your desired resolution.
2. Black Bars on the Sides
- This usually happens when your aspect ratio doesn’t match your project settings.
- Reframe or crop your video to fill the frame correctly.
3. Lagging During Editing
- Lower your timeline resolution temporarily.
- Use optimized media or proxy files to make playback smoother.
Rendering and Exporting in the Right Resolution
When you finish editing, you’ll need to export your project. To do that:
- Go to the Deliver page (the rocket icon).
- Choose a preset, like YouTube or Custom.
- Under the Video tab, make sure your Render Resolution is correct.
- Click Add to Render Queue, then Start Render.
You can export your video in the same resolution as your timeline or choose a higher or lower one. For example, if you edited in 1080p, you can still export in 4K if your original clips were shot in 4K.
Best Practices for Working with Resolution in DaVinci Resolve
- Always set your project resolution before importing clips.
- Use the Set Current Settings as Default option to save time on future projects.
- Avoid constantly changing resolutions during editing unless necessary.
- Test a short clip before rendering the full project to ensure everything looks correct.
- If your video will be used across multiple platforms, consider creating different versions (for example, one 16:9 and one 9:16).
Frequently Asked Questions (FAQs)
Q1: What is the default resolution in DaVinci Resolve?
The default resolution is usually 1920 × 1080 (Full HD). You can change it anytime in the Project Settings.
Q2: Can I edit 4K videos on a 1080p timeline?
Yes. This helps improve playback performance. When exporting, you can still choose 4K as your output resolution.
Q3: How do I make DaVinci Resolve remember my preferred settings?
After adjusting your settings, click the three-dot menu in the top right corner of the Project Settings window and select Set Current Settings as Default. This saves your resolution and other preferences.
Q4: Will changing resolution affect my clips?
If you change the aspect ratio (for example, from widescreen to vertical), you might need to reframe your clips. Otherwise, DaVinci Resolve will automatically scale them to fit.
Q5: What resolution is best for YouTube?
For most videos, 1920 × 1080 (1080p) is perfect. If you want higher quality and your computer supports it, you can export in 4K (3840 × 2160).
Final Thoughts
Understanding DaVinci Resolve resolution is essential for producing clear, professional-quality videos. By setting your project resolution correctly from the start, you ensure your final product looks great and performs well on any device or platform.
Remember the simple steps:
- Go to Project Settings
- Choose your Timeline Resolution
- Adjust your Frame Rate
- Click the three-dot menu and select Set Current Settings as Default
With these settings in place, you can focus on what really matters — creating amazing videos with confidence.